Connect to Mysql
Use Chat2DB to quickly connect to Mysql server
Step 1: Create a new connection
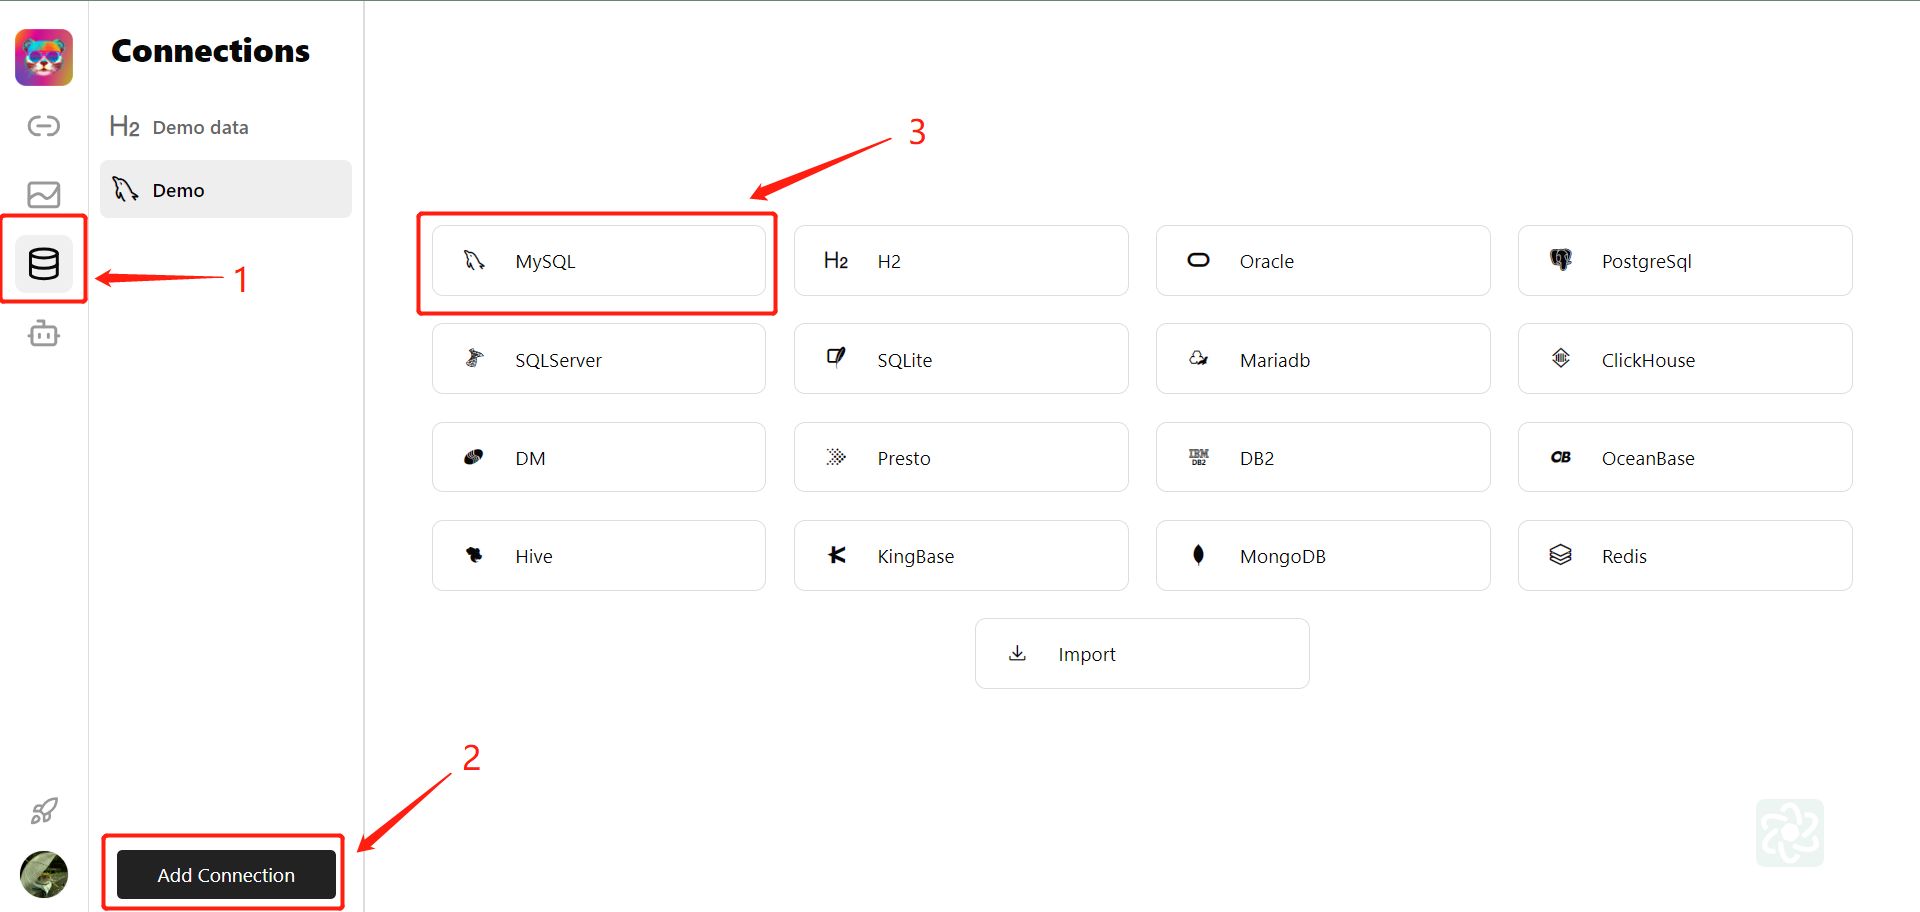
Click the database button on the left, select New Connection, and select Mysql
Step 2: Fill in the connection information
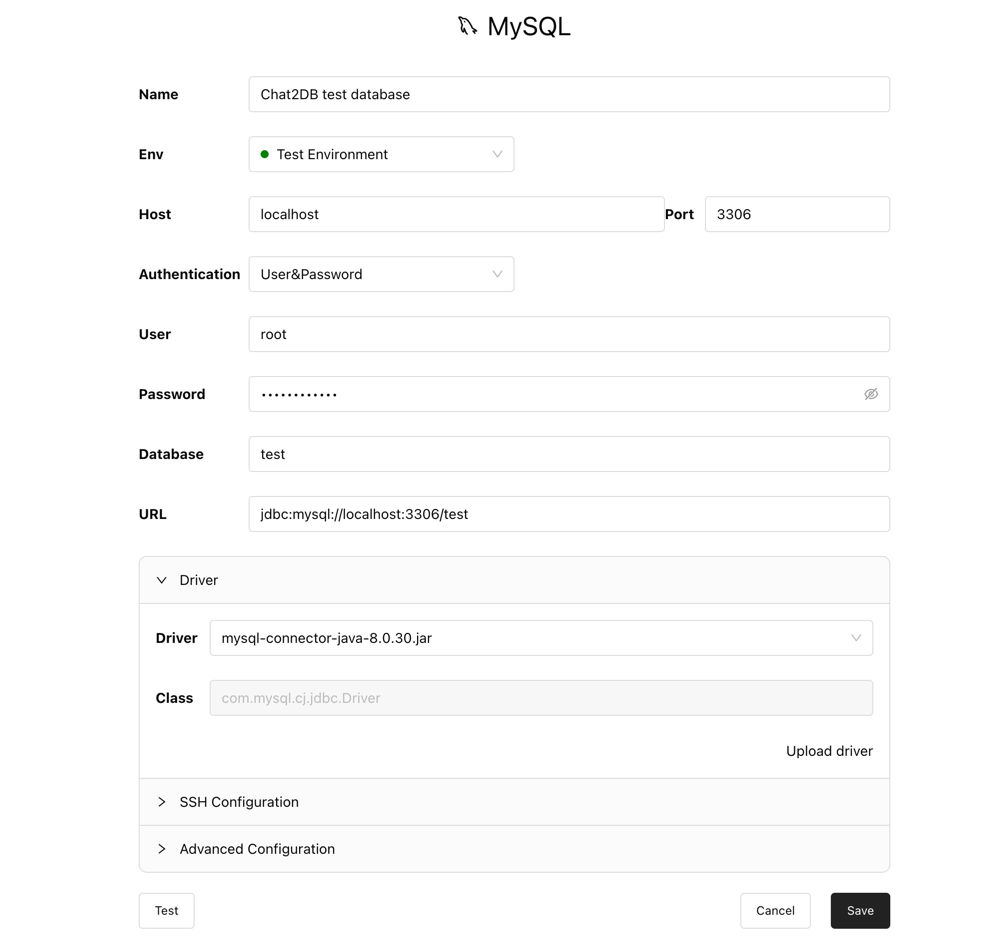
Name: The connection name can be customized to facilitate memory.Env: Select the connection environment, testing, production, etc. to distinguish connections in different environmentsHost: Mysql server address, which can be IP or domain namePort: Mysql server port, default 3306Authentication: Mysql authentication method, username and password or no authentication requiredUser: Mysql usernamePassword: Mysql passwordDatabase: Mysql database name, optional, if not filled in, it will connect to the default databaseURL: Mysql connection URL, optional, if not filled in, it will be automatically generated based on the above informationDriver: Mysql driver, optional. If not filled in, it will be automatically identified based on the URL. You can also select it manually. After manual selection, the driver configuration items will be displayed.SSH: Whether to use SSH connection, optional. If not filled in, it will be disabled by default. SSH configuration items will be displayed after selection.Advanced Configuration: Advanced configuration, optional, not used by default if not filled in, advanced configuration items will be displayed after selection
Step 3: Download the driver

If you do not select a driver, you need to download the Mysql driver. Click the download button Download Driver to download the latest Mysql driver. You can also manually upload your own driver Upload driver
Step 4: Configure SSH channel

USE SSH: whether to use SSH channelSSH Host: SSH server addressSSH Port: SSH server port default 22Authentication: SSH authentication method, username, password or private keyUser: SSH usernamePassword: SSH passwordTest the SSH connection: Test whether the SSH connection is normal
Step 5: Test connection
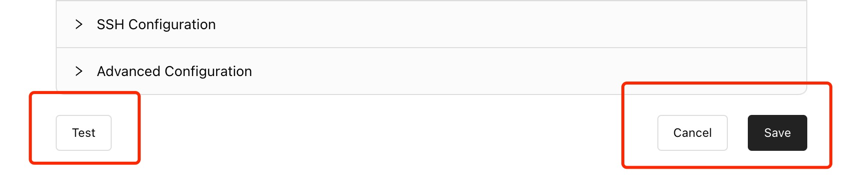
Click the test button in the lower left corner to test whether the connection is normal. If the connection is normal, the connection will be successful. Otherwise, the connection will be failed. You can adjust the connection information according to the error message.
Step 6: Save the connection
After the test connection passes, click the Save button to save the connection information. The connection information will be displayed in the database list on the left. Click the connection information to view the connection details or delete the connection.