Quick Start
📖 Introduction
Chat2DB is an AI first data management, development, and analysis tool. Its core is AIGC (Artificial Intelligence Generation Code) capability. It can convert natural language into SQL, convert SQL into natural language, and can also automatically generate Reports greatly improve personnel efficiency. Through one product, the capabilities of data management, data development, and data analysis can be realized. Even those who do not understand SQL can use the ability to quickly query business data and generate reports.
🚀 Quick Start
Our products provide two ways of use: web page and client. The web page can be used out of the box, and the client provides a smoother user experience. At the same time, when some private databases or local data cannot be accessed from the public network, the client can connect to your database locally and use it directly without the need for a proxy. It is simple and convenient, and you can flexibly switch between using the web page or the client according to your scenario. Below we explain how to use our products.
WEB access address: https://app.chat2db.ai (opens in a new tab), Client download address: https://chat2db.ai/download (opens in a new tab)
Step 1: Client download
If you use the web version, you can ignore this step and directly visit Application Address (opens in a new tab).
Client download address: Client download address (opens in a new tab) Just select the corresponding system to download and install. We support Windows, Mac, and Linux.
Step 2: Register and log in
You can get the verification code directly through your email and log in directly, or you can use a third party to log in. Currently supports multiple login methods such as Github and Google.
Login address (opens in a new tab)
Chat2DB currently supports 5 login methods:
- Google login
- GitHub login
- WeChat login
- Log in with email verification code
- Log in with email and password
Step 3: Create a database connection
Database connection is the first step for us to use Chat2DB. We need to connect to your database to perform subsequent operations. Click the database connection on the left, then click New Connection in the lower left corner, select the database you use, fill in the database connection information, and click Save. Currently we support Mysql, Postgresql, SQLServer, DB2, Oracle, SQLServer, Oceanbase, Clickhouse, Redis, H2, SQLite, Dameng, Renmin University of Finance and many other databases.
1. Create a new connection
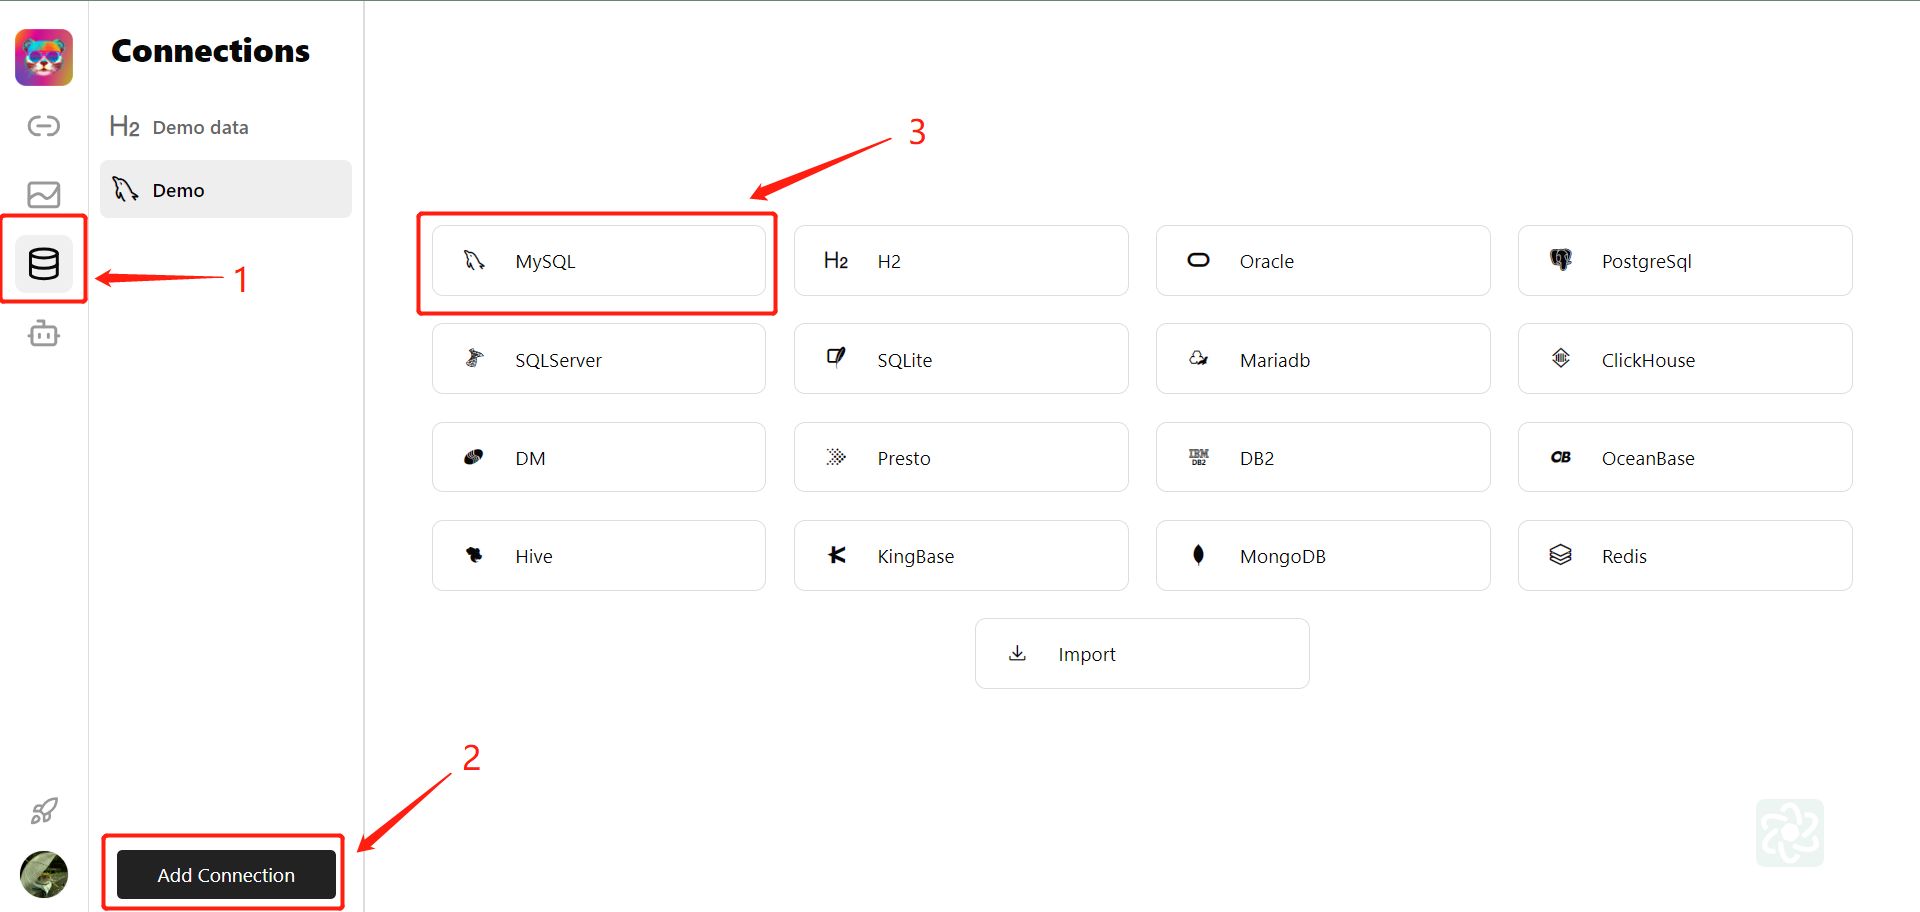
Click the Database button on the left, select New Connection, select the database type you need, fill in the database connection information, and click Save.
2. Fill in the database connection information
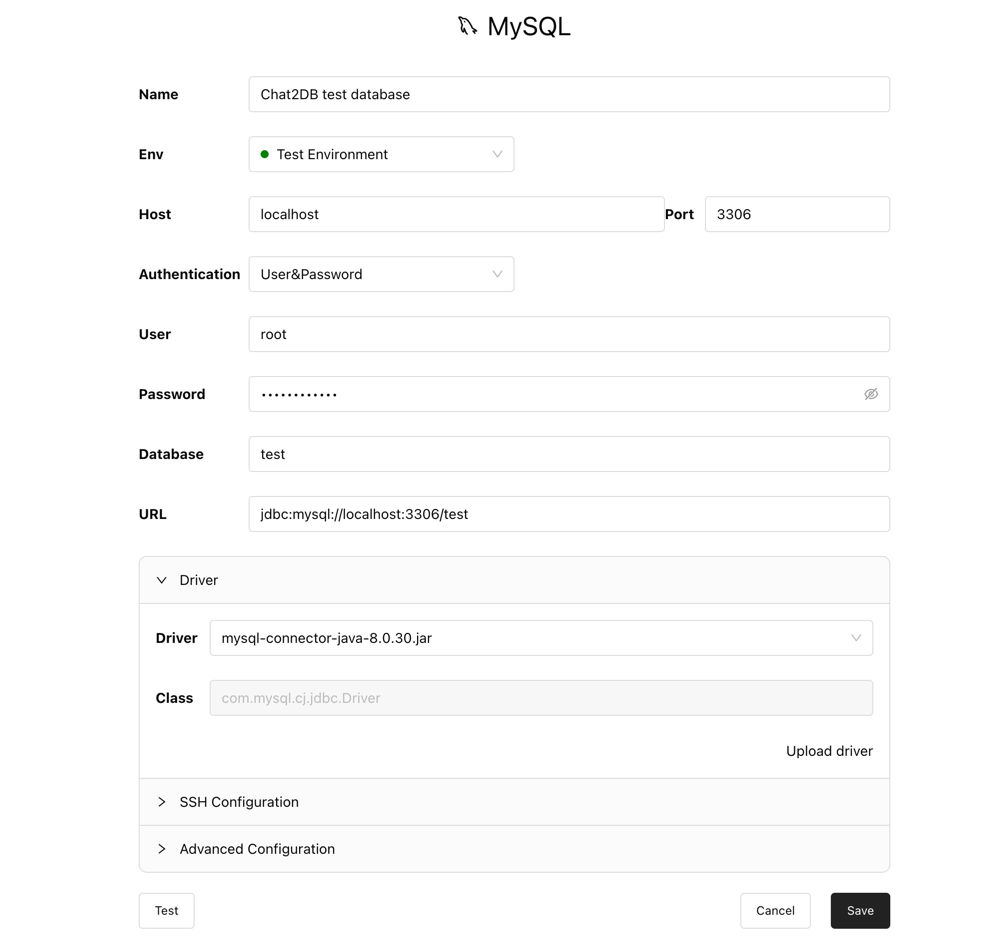
Name: The connection name can be customized to facilitate memory.Env: Select the connection environment, testing, production, etc. to distinguish connections in different environmentsHost: Mysql server address, which can be IP or domain namePort: Mysql server port, default 3306Authentication: Mysql authentication method, username and password or no authentication requiredUser: Mysql usernamePassword: Mysql passwordDatabase: Mysql database name, optional, if not filled in, it will connect to the default databaseURL: Mysql connection URL, optional, if not filled in, it will be automatically generated based on the above informationDriver: Mysql driver, optional. If not filled in, it will be automatically identified based on the URL. You can also select it manually. After manual selection, the driver configuration items will be displayed.SSH: Whether to use SSH connection, optional. If not filled in, it will be disabled by default. SSH configuration items will be displayed after selection.Advanced Configuration: Advanced configuration, optional, not used by default if not filled in, advanced configuration items will be displayed after selection
Different databases on the client need to download different drivers. If you need SSH connection, you need to fill in the SSH information.
Step 4: Test connection
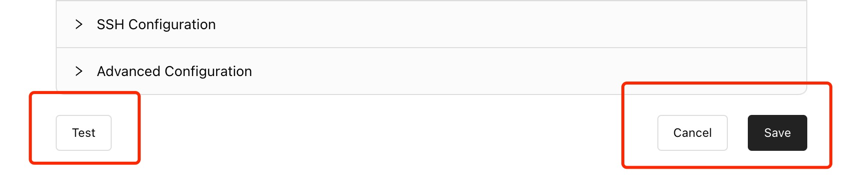
Click the test button in the lower left corner to test whether the connection is normal. If the connection is normal, the connection will be successful. Otherwise, the connection will be failed. You can adjust the connection information according to the error message. Finally click Save.
Step 5: Use Chat2DB database development
After the connection is successful, you can double-click the connection or right-click to enter the connection. Then you can add, delete, modify, and query the database in Chat2DB. You can also use our AIGC capability to directly query the database using natural language, or use SQL to convert to natural language.
1. Database management
Double-click the newly created connection to enter the database management interface, where you can add, delete, modify, and query the database.
2.Data table management
Create a new edit table
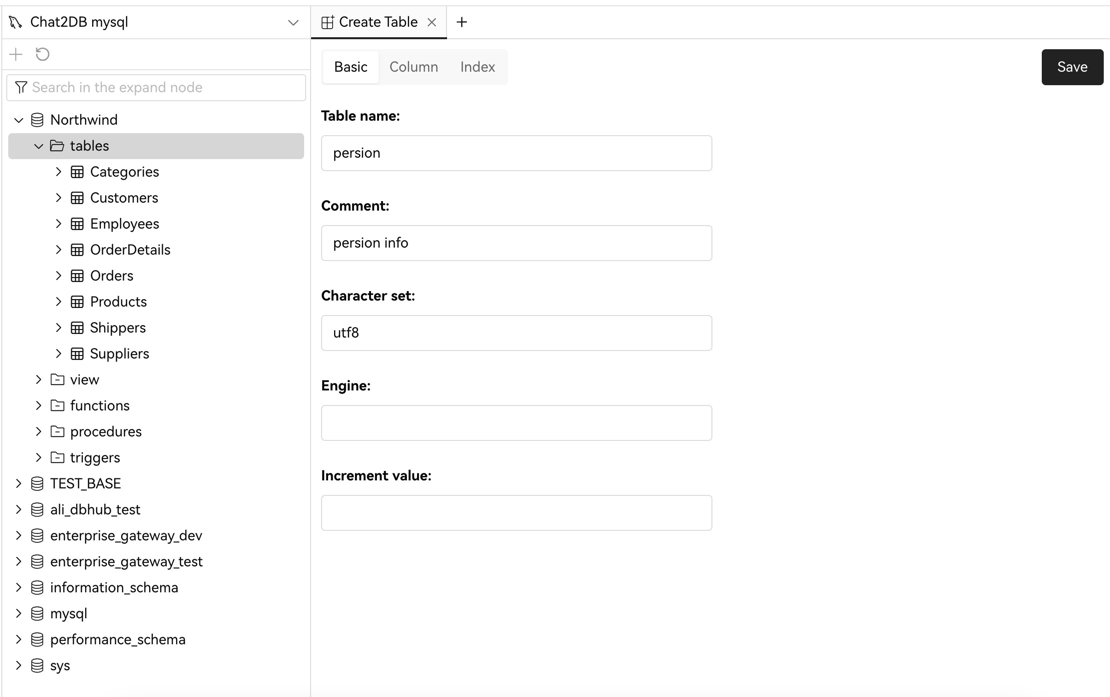 Create a new form and fill in basic information
Table Name: table nameComment: table commentCharacter set: character setEngine: storage engineIncrement value: self-increment start value
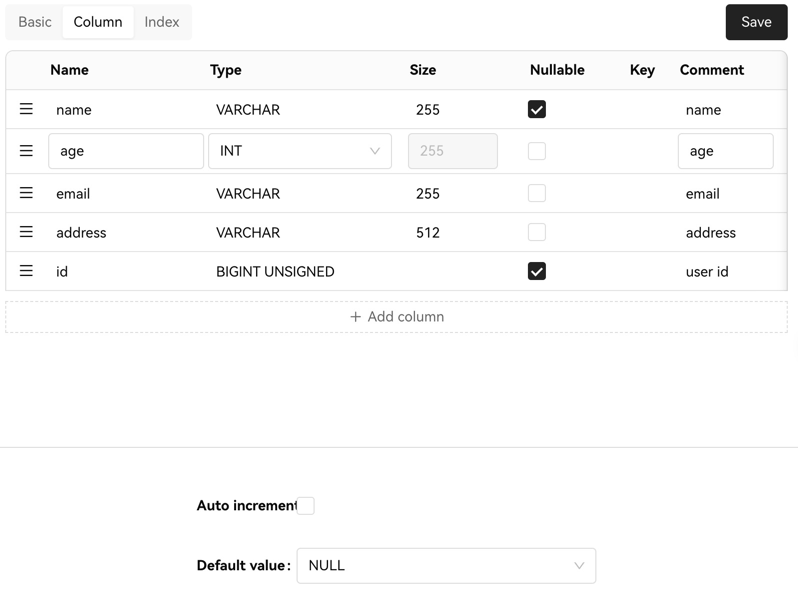 Fill in column information
Column Name: column nameType: typeSize: lengthNullable: whether it is emptyKey: primary keyComment: comment
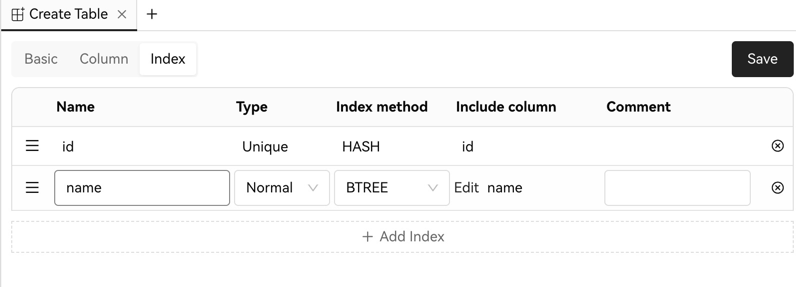
Index Name: index nameColumn: column nameType: index typeComment: comment
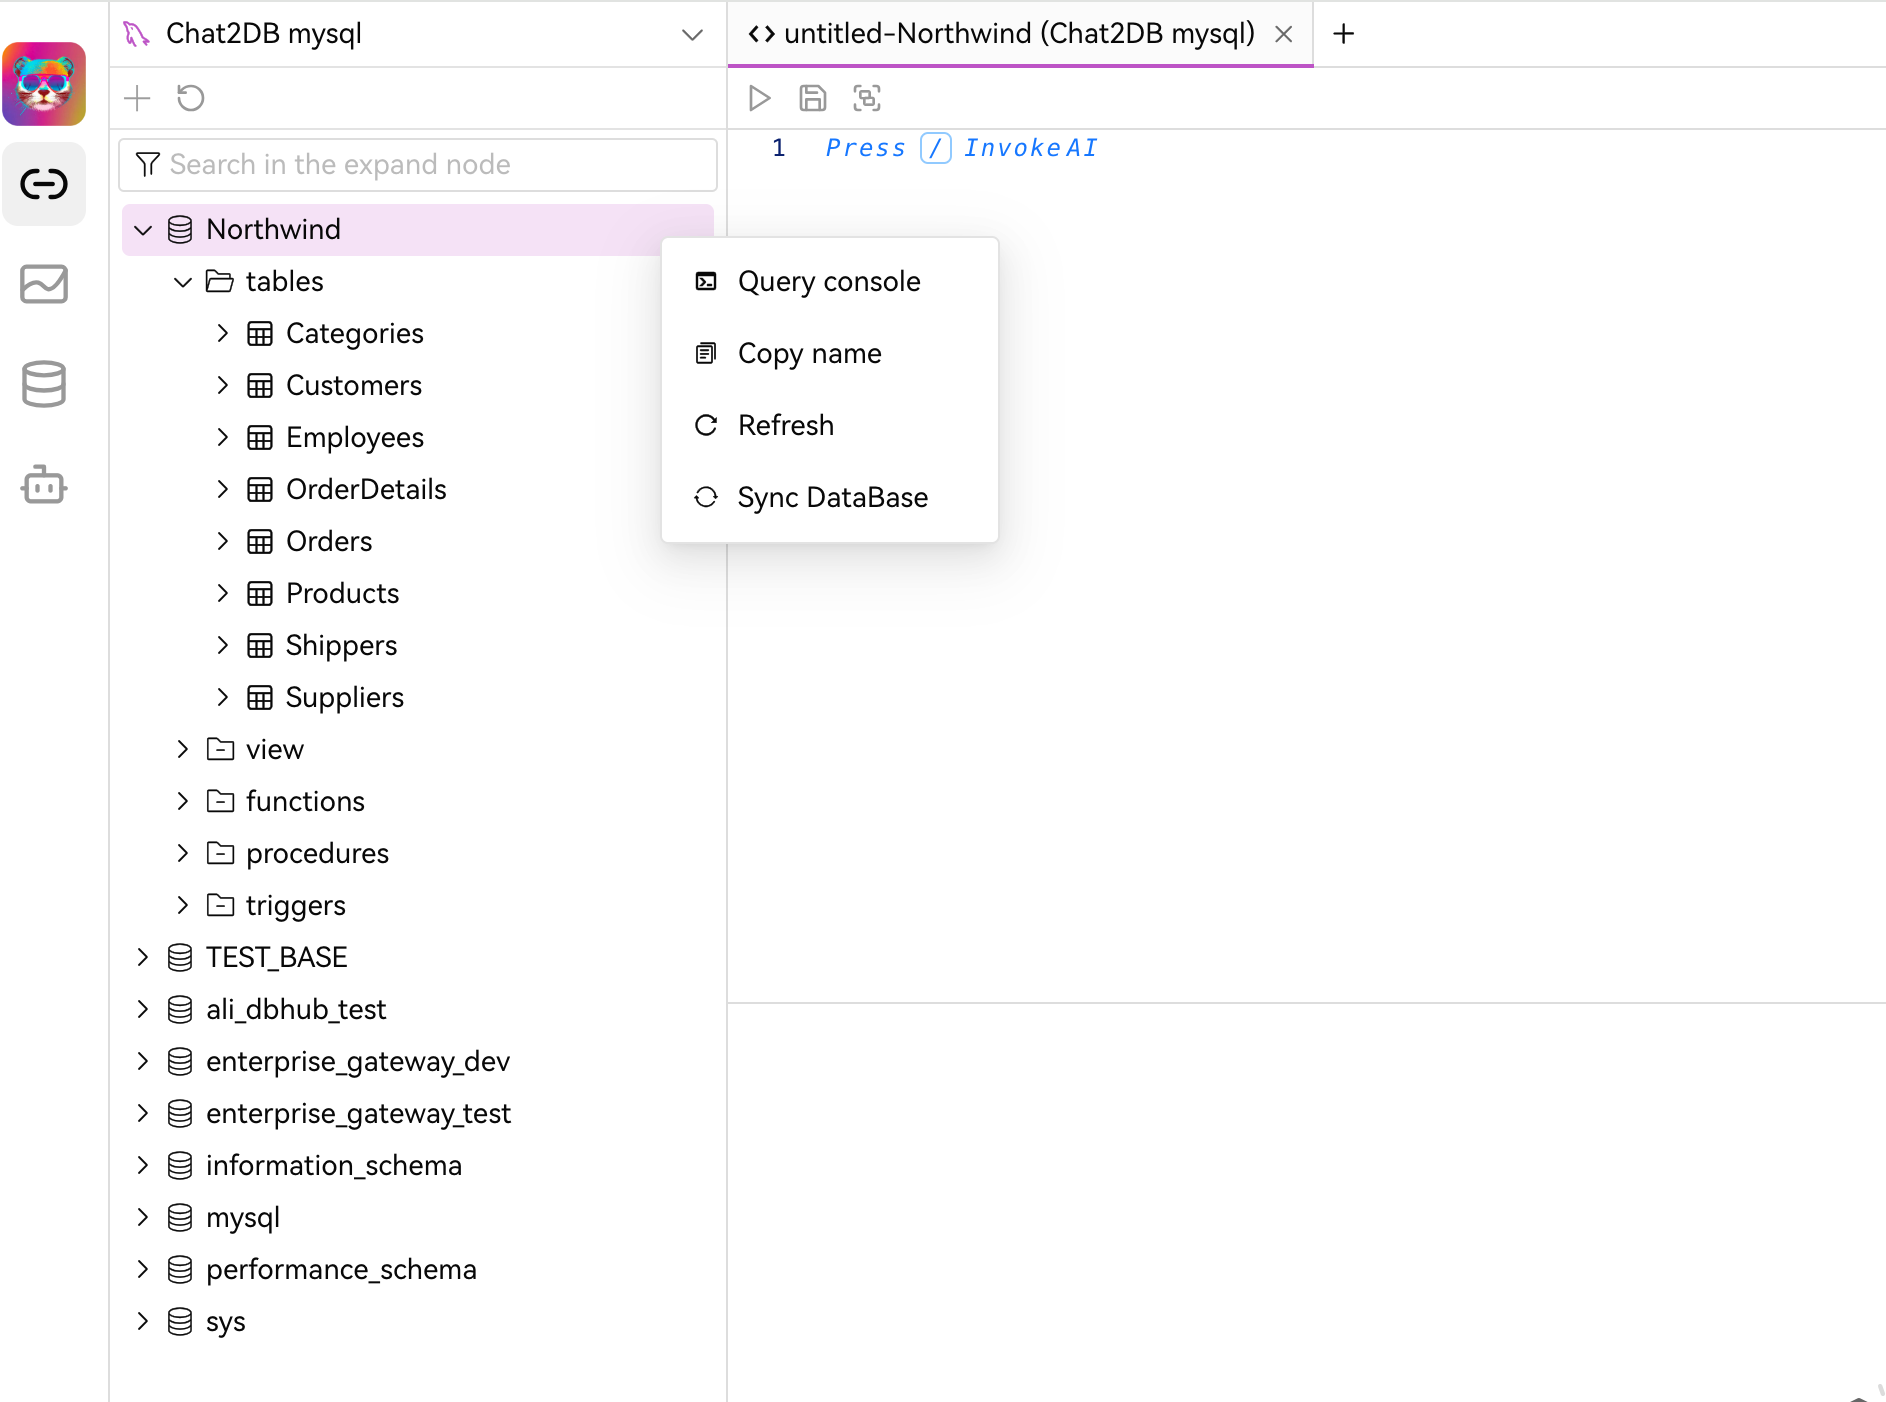
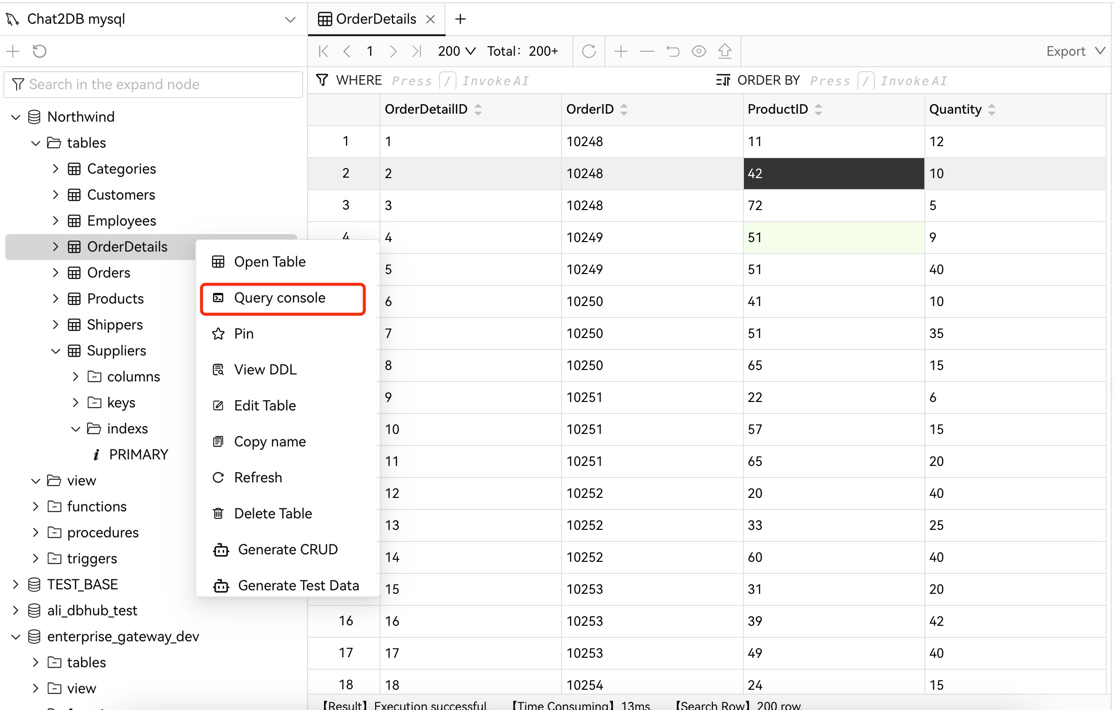
3. Data query
tables, table (a specific table), right-click and select Query Console to query the data of the desired conditions through SQL
Step 6: Use Chat2DB data analysis
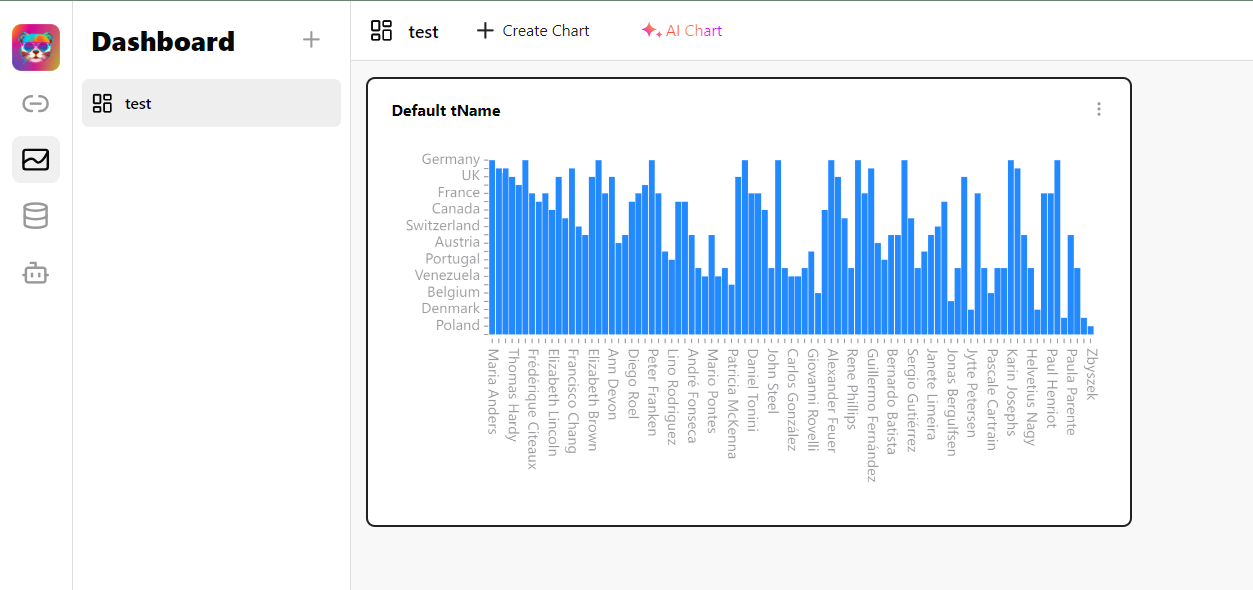
Click Dashboard on the left, then click the "+" sign to create a new report, fill in the report information, then select the report type you need, and click Save.
1. Create a new report
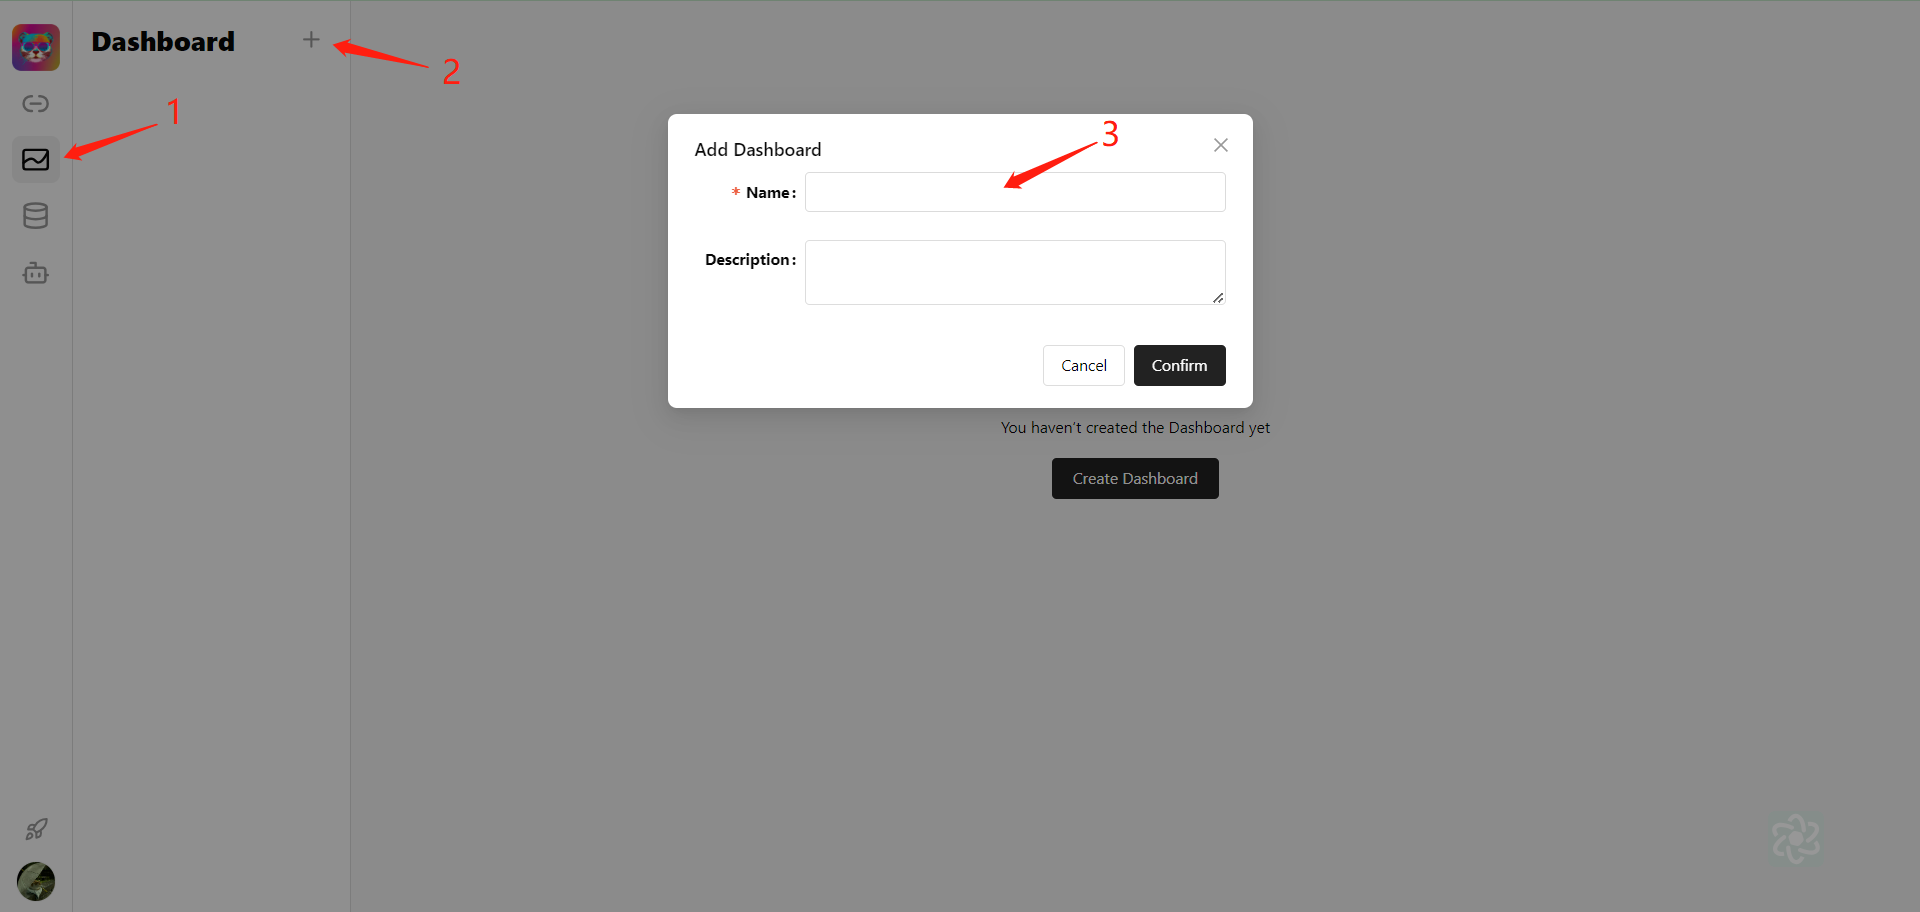
Click Dashboard on the left, then click the "+" sign to create a new report, fill in the report name (required) and report description (optional).
2. Fill in the report information
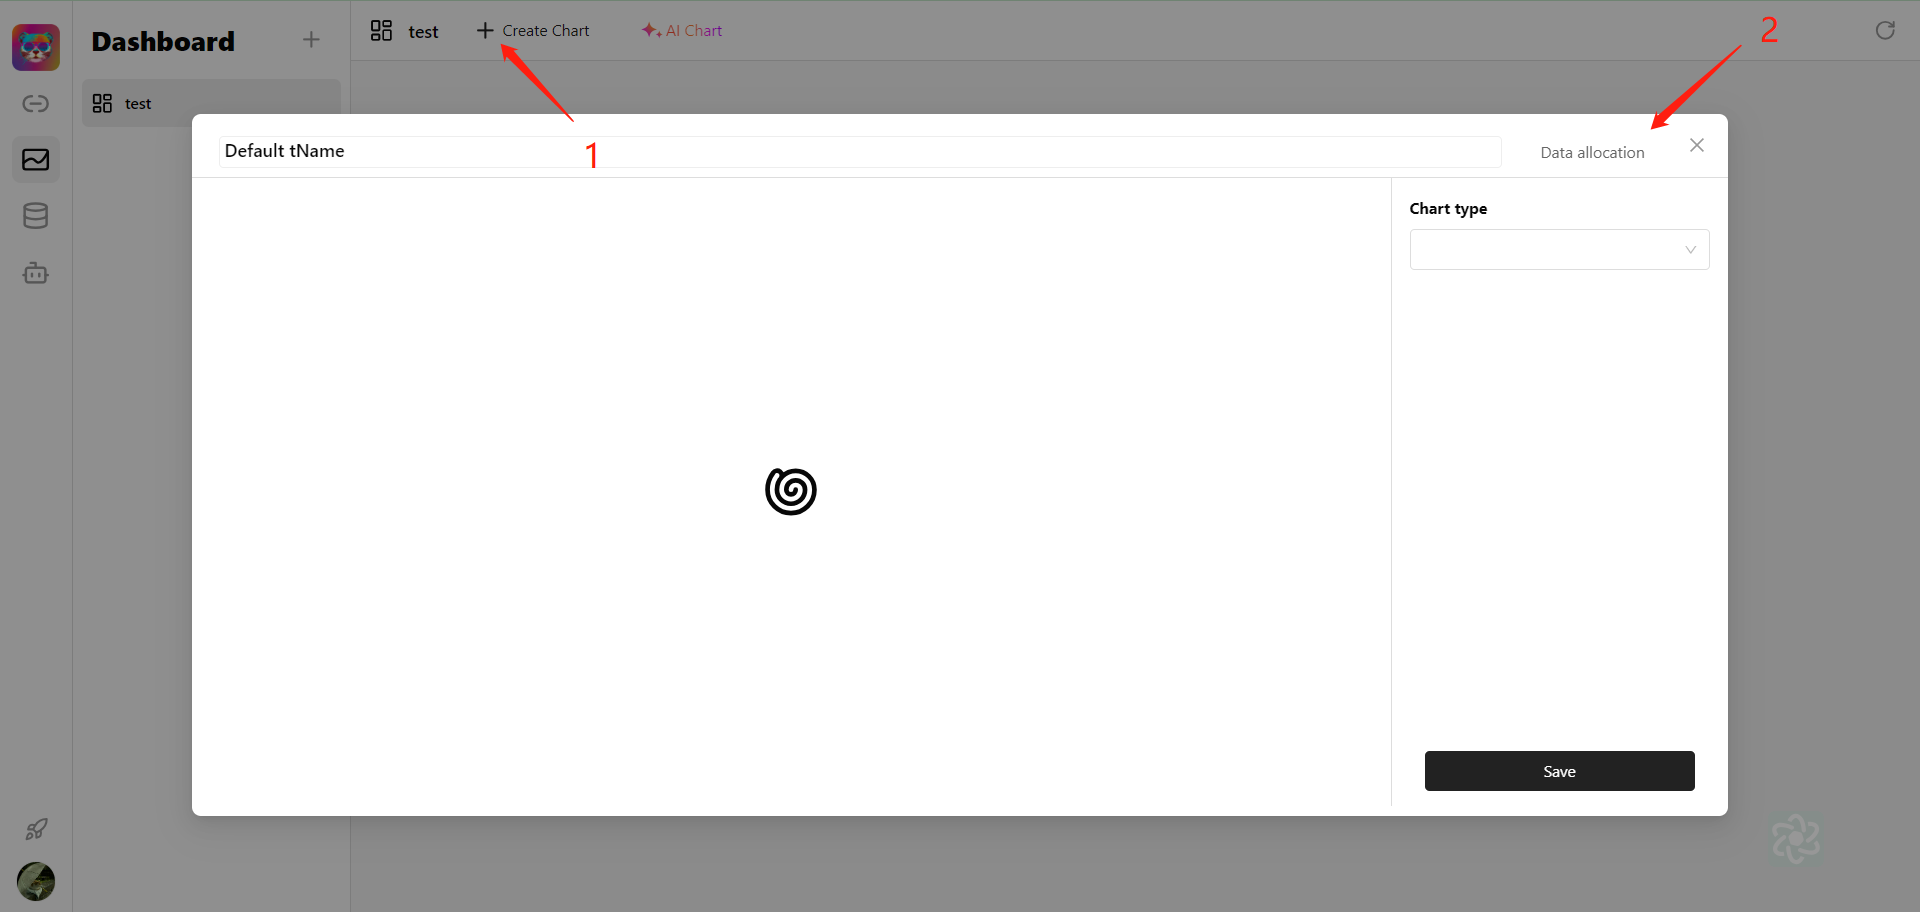
Click Create Chart, then click Data allcation on the page to select the database corresponding to the generated report.
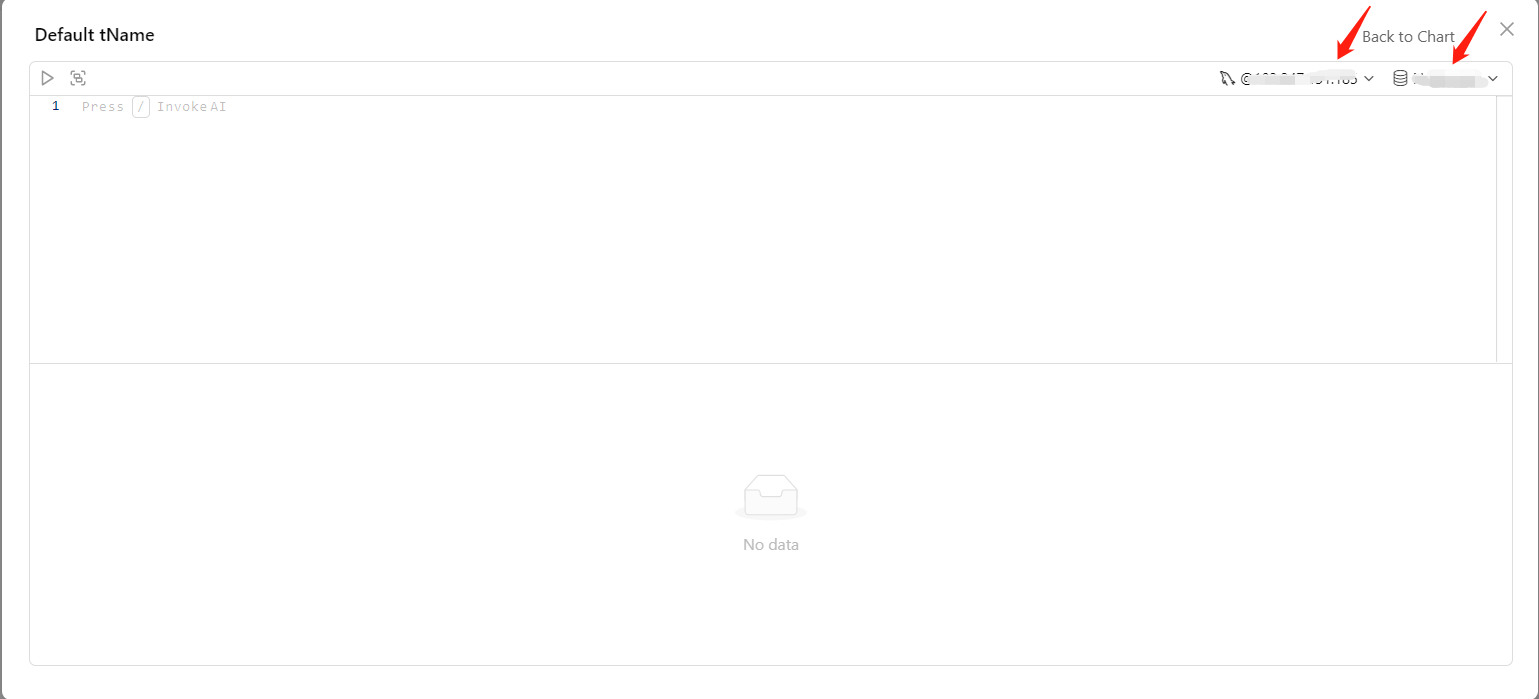
After selecting, write the corresponding sql statement, click Run, and then click Back to Chart.
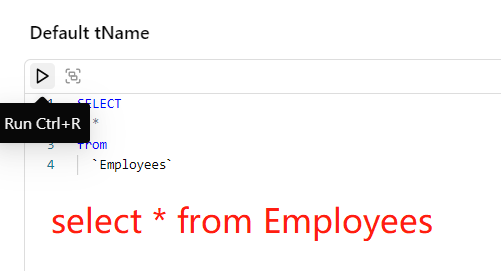
For example: I want to query the information in the Employees table and create a report.
3.Select report type
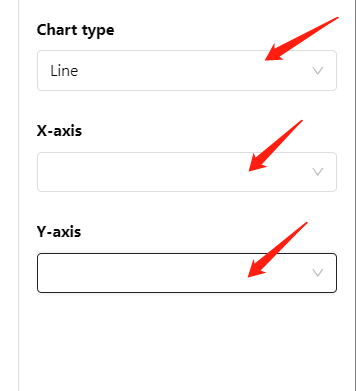
Select the report type here and determine the corresponding variables (horizontal and vertical axis coordinates, percentages...) according to the selected type.
4. Save the report

After selecting, click save to save!